大家一定和我一样,安装完成后迫不及待地想知道Cisco CallManager是否工作.下面就讲一下Cisco CallManger的简单设置,并用Cisco IP Communicator做一下测试.
测试环境:
1.Cisco CallManager服务器
2.两台电脑,或虚拟工作站
3.Cisco IP Communicator安装文件
准备工作:
在DOS窗口执行ipconfig /all命令,记下Cisco CallManager服务器的IP地址和MAC地址,两台电脑的MAC地址
1.在Cisco CallManager 服务器上运行Cisco Service Configuration.点击服务器名字. 
2.点击Set Default选择缺省服务.点击Update.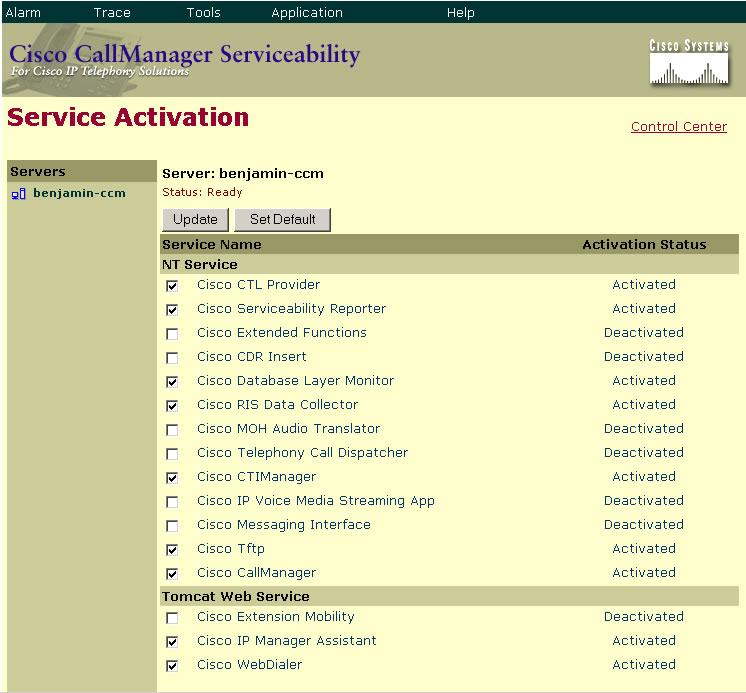
3.运行CallManager Administration.选择System->Server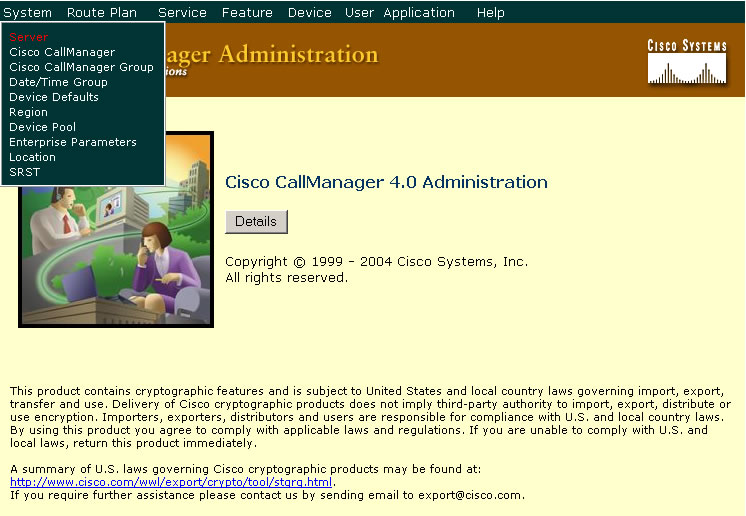
4.点击Find,然后点击服务器名字.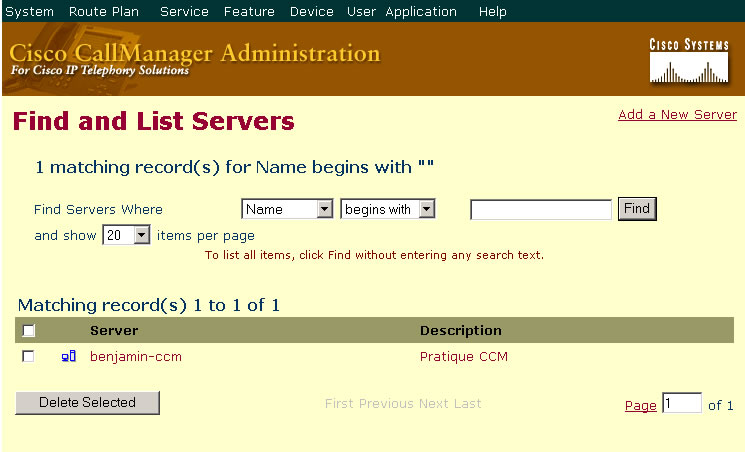
5.输入服务器IP地址和MAC地址.点击Update.建议使用IP地址,而不要使用Wins机器名或域名,因为那样如果Wins服务器或域名服务器发生故障的时候,电话就找不到CallManager服务器了.
6.选择Device->Phone.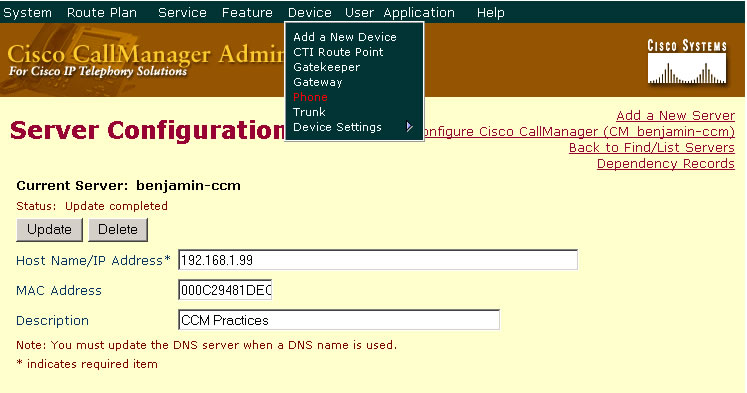
7.点击Add a New Phone.
8.Phone Type选择Cisco IP Communicator.
9.输入第一台电脑的MAC地址,Device Pool选择Default.点击Insert.
10.点击OK添加电话号码.
11.输入电话号码,点击Add.
12.选择User->Add a New User.
13.输入用户的名字,姓氏,User ID, 密码,确认密码,PIN,确认PIN,电话号码,用户语言.点击Insert.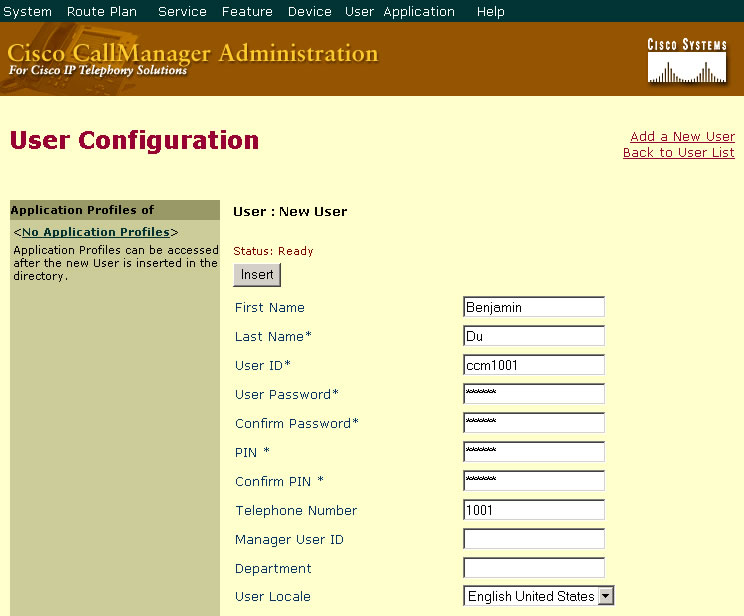
重复第6至第13步添加另一部电话.
14.在CallManager服务器上安装Cisco IP Communicator Administration Tool. 运行CiscoIPCommunicatorAdminTool.exe,点击Next进入下一步.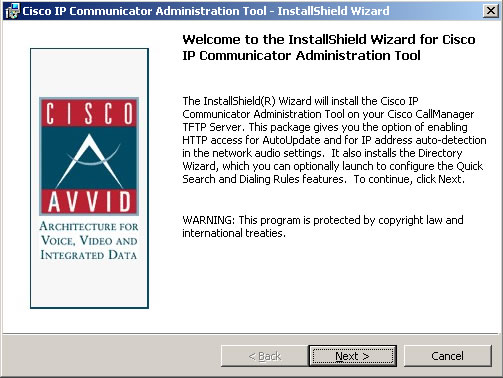
15.接受安装条款.
16.点击Install开始安装.
17.选择 Launch the Directory Wizard,点击Finish.
18.配置DC Directory,点击Next进入下一步.
19.点击Auto-detect,然后进行下一步.
20.点击Auto-detect,然后进行下一步.
21.点击Generate LdapDirectories.xml file,进行下一步.
22.点击Yes,进行下一步.
23.点击Finish安装完成.
24.在第一台电脑上安装Cisco IP Communicator.
参见第四帝国兄<Cisco IP Communicator 1.1.5安装说明>
http://league.e-train.com.cn/vie ... &extra=page%3D3
25.配置CallManager用户信息.这里的Username即在CallManager上添加用户时的User ID.
26.配置网络.TFTP Server 1的地址即CallManager服务器的IP地址.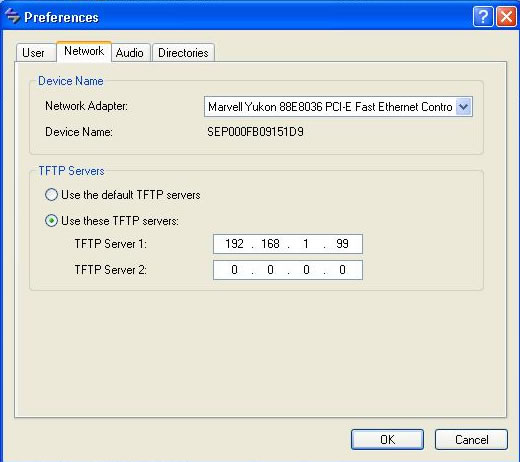
27.配置Directories用户信息.同25. 
28.现在Cisco IP Communicator应该可以成功注册了.点一下电话号码后面的按钮,应该可以听到拨号音.点一下Settings按钮(打勾的那个),选择2 Device Configuration,应该可以看到CallManager服务器的名字.点一下Directories按钮(小本子那个),选择4.Enterprise Directory,点击Search应该可以看到在CallManager上添加的所有用户姓名和电话号码.
重复第24步至第28步,在第二台电脑上安装Cisco IP Communicator.应该可以通话了.
注:我用的是CallManager 4.0, Cisco IP Communicator 2.0 不能注册.但Cisco IP Communicator 1.1.1.0没问题.
|

