|
TOP
|
| [ 录入者:admin | 时间:2007-11-22 23:20:47
| 作者: | 来源:
| 浏览:896次 ] |
1 拓扑结构

上图中使用CCM4.13与CCM5.0 通过inter-trunk的模式进行互通,公用一台2600系列路由器,并
通过FXO连接PSTN。内部网通过一台交换机实现各设备的互联,DHCP做在一台PIX上,并通过PIX连接
互联网
2 详细配置
配置概述:本文档主要涉及Voice 相关的配置,对于数据及安全方面的配置请参考其他资料,同时对
CCM的配置中,主要收集两个Cluster之间的配置及落地的配置,其他配置请参考其他文档。
IP地址分配表
设备 端口 Ip 地址
Firewall E0 192.168.5.254
交换机 192.168.5.253
Voice Gateway E0 192.168.5.246
CCM4.13 192.168.5.249
CCM5.0 192.168.5.244
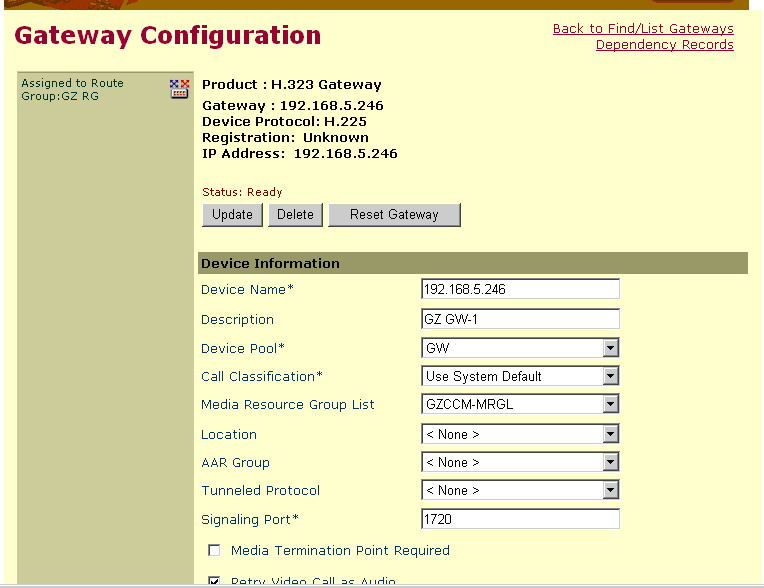
2.1 Voice Gateway
!
voice class codec 100
codec preference 1 g711alaw
codec preference 2 g711ulaw
codec preference 3 g729r8
codec preference 4 g729br8
!
// 定义网关上的codec class,用于codec转换
!
interface Ethernet0
ip address 192.168.5.252 255.255.255.0
half-duplex
h323-gateway voip bind srcaddr 192.168.5.252
!
//配置E0 端口,并配置该H.323网关所使用的源地址
!
ip route 0.0.0.0 0.0.0.0 192.168.5.254
!
//配置缺省路由
!
!
l
!
voice-port 1/0/0
cptone CN
timeouts call-disconnect 5
timeouts wait-release 5
timing hookflash-out 500
connection plar 2200
supervisory disconnect dualtone mid-call
!
//配置FXO port,同时设置相关应答/挂断参数
!
!
dial-peer voice 8000 voip
destination-pattern ....
voice-class codec 100
session target ipv4:192.168.5.249
dtmf-relay h245-signal
no vad
!
//配置指向CCM4.13的Dial Peer
!
dial-peer voice 1000 pots
destination-pattern 9T
port 1/0/0
//配置落地的Dial Peer
!
2.2 交换机
!
Vlan XX
Name voice
!
Vlan YY
Name *****
Interface vlan XX
Ip add xx.xx.xx.xx xx.xx.xx.xx //配置voice vlan interface
ip helper-address xx.xx.xx.xx
No shut
Interface vlan YY
Ip add yy.yy.yy.yy yy.yy.yy.yy //配置数据vlan interface
No shut
!
interface FastEthernet x/x
description phone and PC
switchport access vlan YY
switchport voice vlan XX
!
2.3 CCM4.13
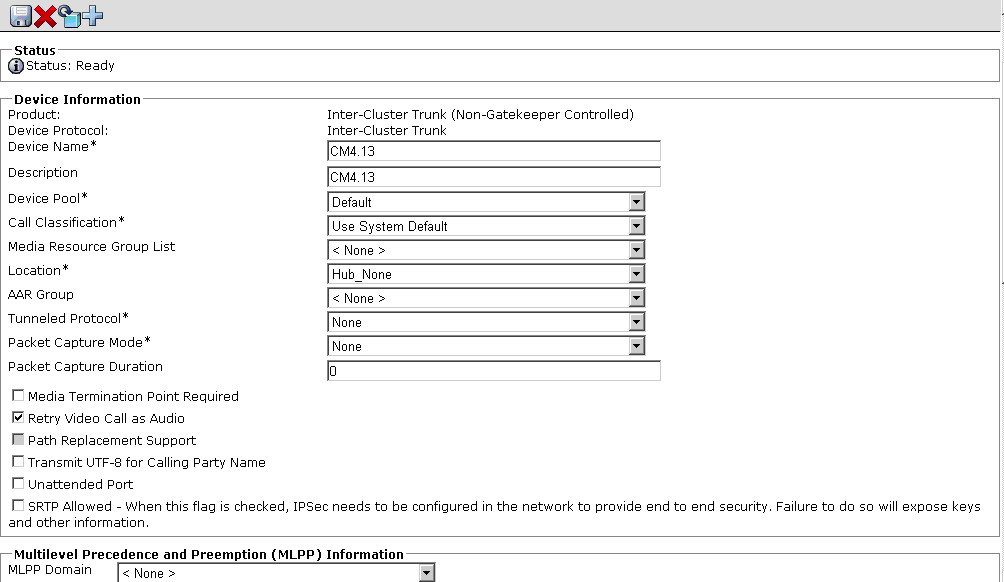
2.3.1 配置与CCM5.0 的Inter-Trunk

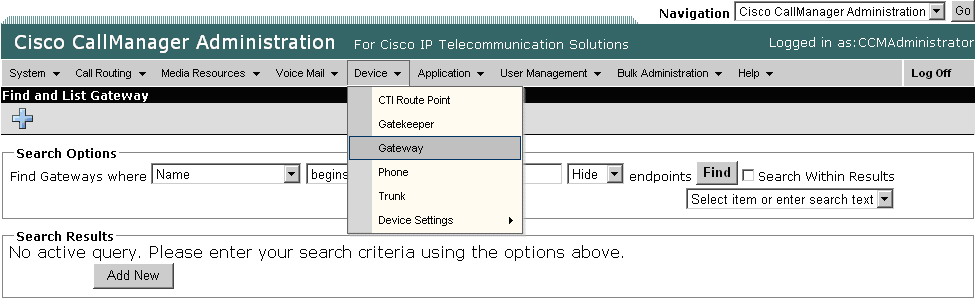
2.3.2 配置落地网关
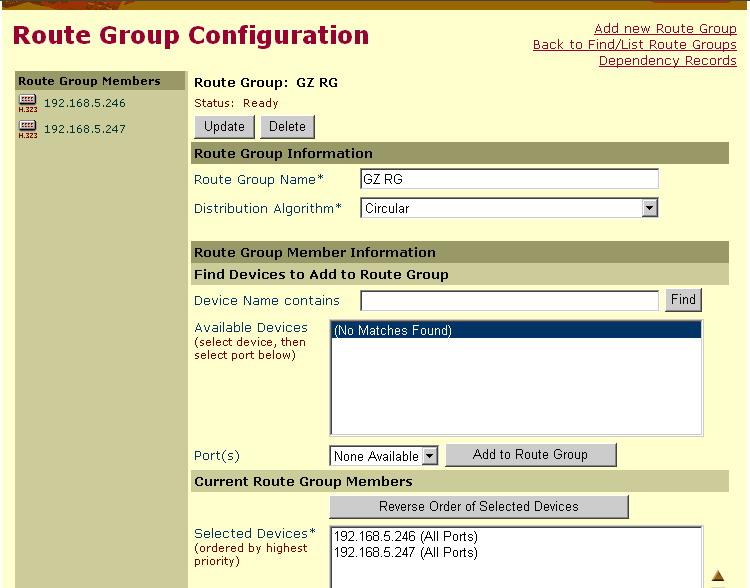
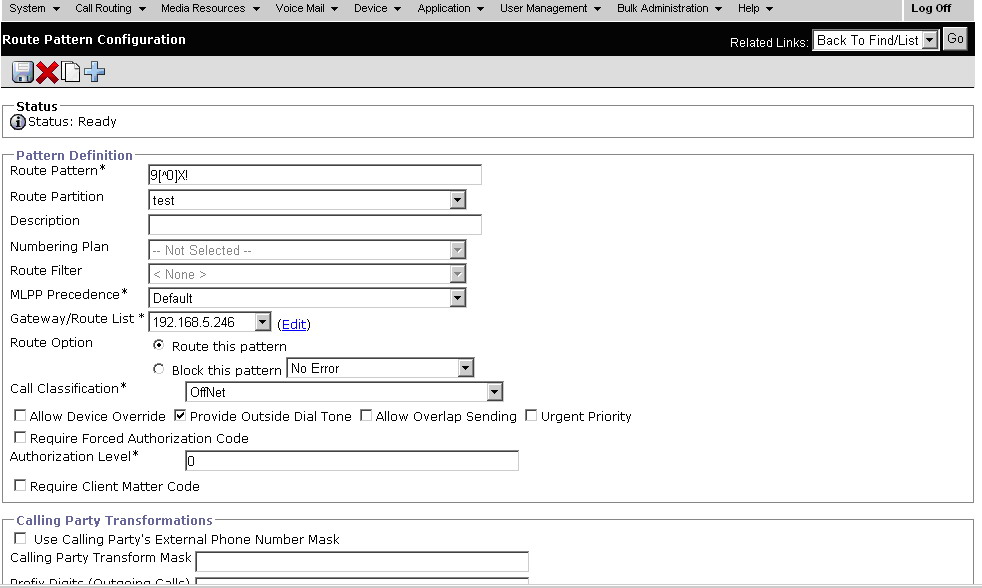
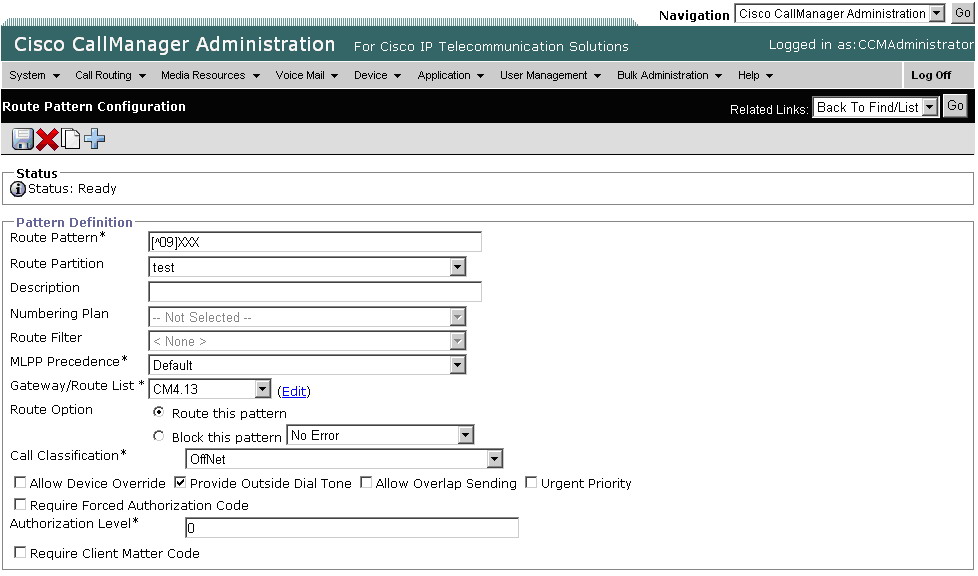
2.3.3 配置落地Route Pattern
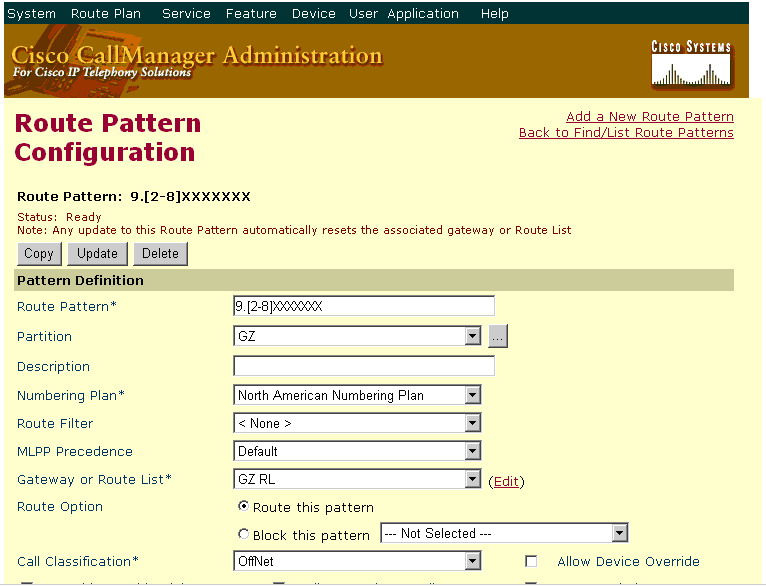
上图中的Gateway or Route List中,使用了一个GZ RL(Route List),该Route List中加载了
一个Route Group,Route Group中绑定了两个网关246和247(247没有体现)
2.3.4 配置与CCM5.0间IP Phone的Route Pattern

2.4 CCM5.0
2.4.1 配置与CCm4.13的inter Trunk

Add a new trunk

Set the Parameters:
Device name: set as you like
Description: Set as you like
Remote Cisco Callmanager Inforation:
Server 1 ip address:[enter the ip address of the primary callmanger]
192.168.5.249
Other configuration: just let it be

2.4.2 增加落地网关
Add a new h.323 gateway


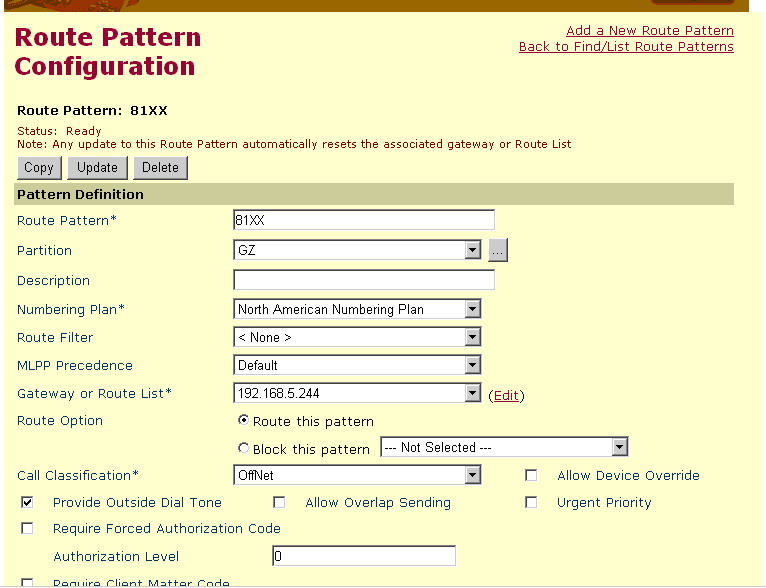
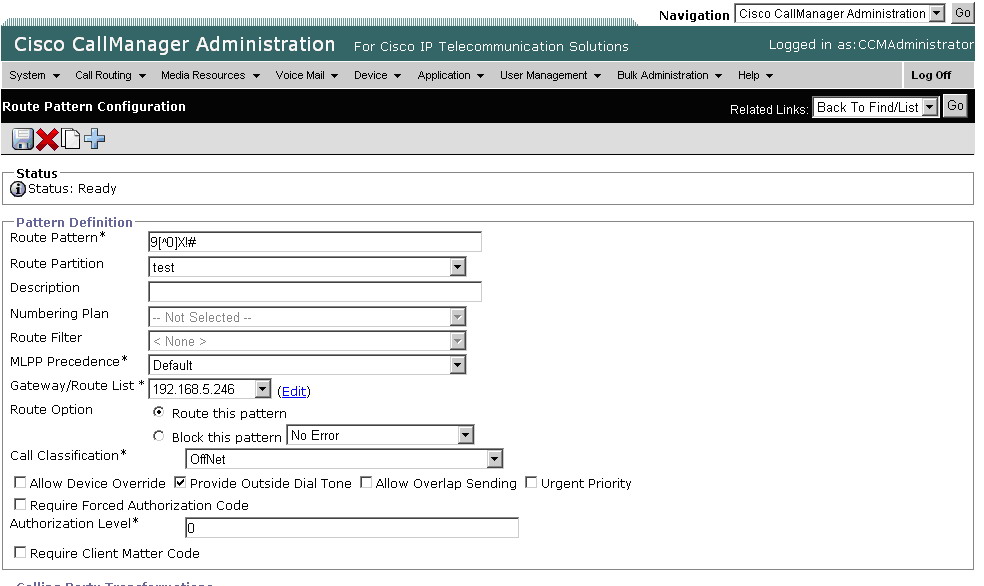
2.4.3 配置落地Route Pattern
配置落地Route pattern,下例仅是针对本地固话的route pattern,对于所有落地的route
pattern建议同时建立有确认键“#”和没有“#”的两个Route Pattern

2.4.4 配置与CCm4.13 间的IP Phone的Route Pattern
2.4.5 X-lite配置
2.4.5.1 Add a user in CCM5.0


2.4.5.2 Add a device/line in CCM5.0
On the Phone configuration page, use the following parameter :
• MAC Address :______(MAC address of the PC where the SIP IP Phone is
installed)
• Device Pool : xxxx
• Phone button template : Third-Party SIP Device (Basic)
• SIP Phone security profile : Non Secure SIP Profile auth by string
• SIP Profile : Standard SIP Profile
• Owner ID : 8188


2.4.5.3 X-lite配置
Run X-lite,right click the screen. Select SIP accounts settingadd

 |
|
|
|

